


Joseph from GreenFlux, LLC here, with my 3rd and final entry for Appsmith's 2021 Hackathon.
Let's build a Slack integration in Appsmith!
Appsmith is great for connecting various APIs and bridging different apps and services in your tech stack. And Slack has a HUGE API with several authentication methods for connecting to those other platforms.
Webhooks
Slack webhooks are the quick and easy way to set up an API endpoint for sending messages, but they come with a few limitations:
- webhooks only work for sending incoming message to Slack
- the message can only be sent as a 'bot', not as different users
- the webhook has to be installed to a specific channel or direct message
However, it's much less work to configure than a Slack app with full API access using OAuth flow. If you can live with these limitations, then I'd recommend sticking with the webhook method.
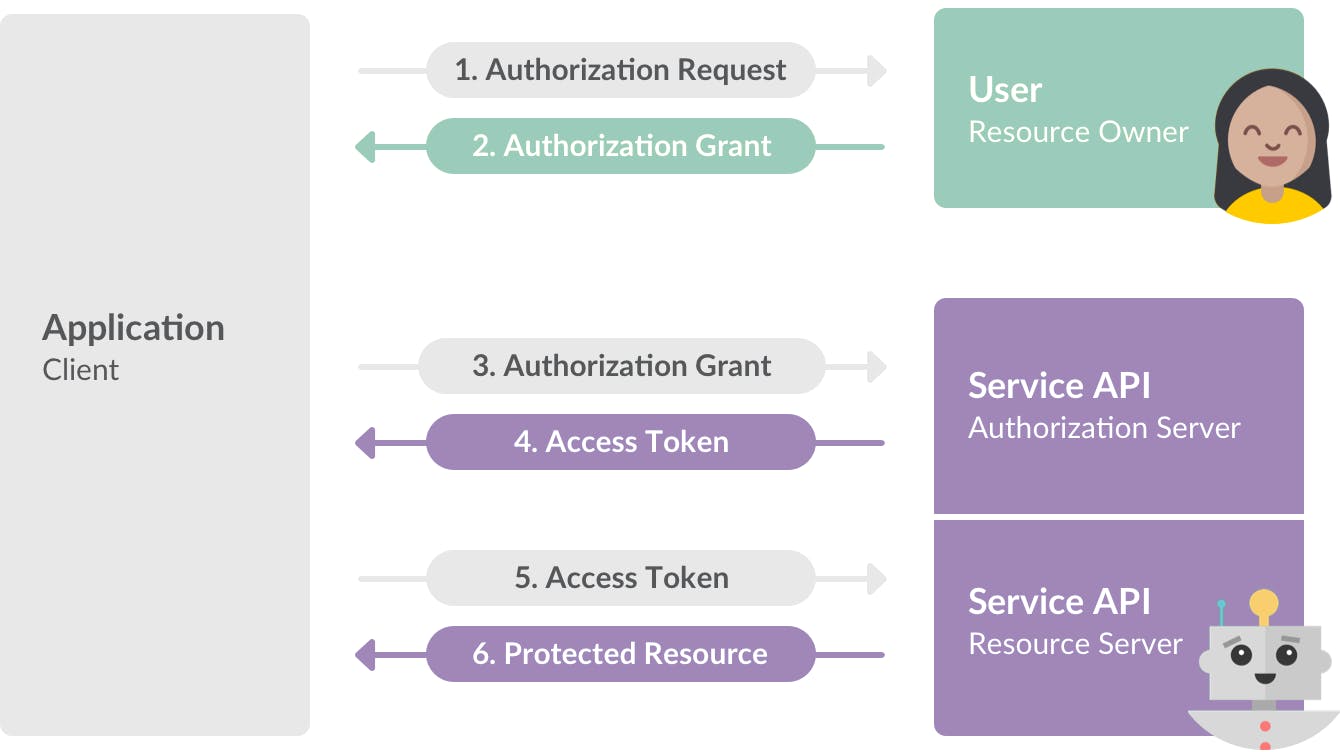
OAuth 2.0 Flow
For more advanced integrations, Slack apps can be installed with OAuth 2.0 flow to grant the app specific 'scopes', or permissions to run different actions, as any user and in any workspace. The authentication steps are a little tricky to figure out, but this will provide a much wider range of options for the actions you can perform through the API, instead of just sending incoming messages as a bot to one specific channel or direct message.
Ok, let's be serious, it's more than a little tricky. OAuth 2.0 flow is a huge pain. There's a lot to it, and I'm no expert. I'm not even going to attempt to explain the topic, but I can at least show you how to obtain an access token so you can start making API calls in Appsmith.
For an in-depth explanation of OAuth 2.0 flow, check out this guide:
And here's Slack's official OAuth guide:
Create new Slack App
Start by creating a new Slack app , which will assign a client ID and secret. Then click on the Add features and functionality section to expand the menu, and choose Permissions.
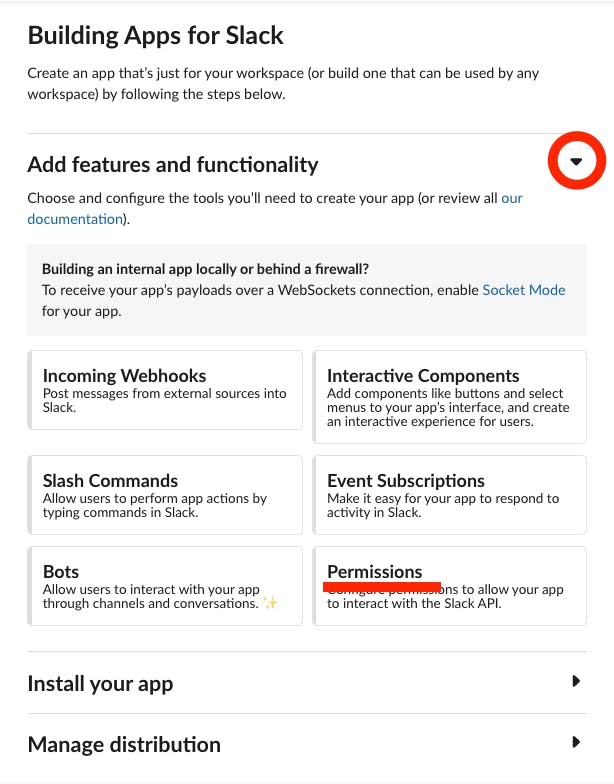
From there, scroll down and add a new Redirect URL. This URL is where you'll receive the authorization code needed to request an access token.
Now, you could program in some way to 'catch' this code and automate the next step. However, this only has to be done once and can be done manually if you're authorizing your own app. Automating it would be more important if you're distributing the app to lots of users who would be installing the app to different workspaces. We're gonna cheat and just grab the code from the URL after being redirected. I used my own website as the redirect URL but you can use any valid address. After authorization, you'll be redirected to this address and can copy the authorization code needed for the next step from the address bar.
Ok, we have a new Slack app created, and a redirect URL assigned. Now we can start the actual OAuth flow and send our first request!
Step 1: Request Scope(s)
Before we can send authenticated API requests to Slack, we need an access_token. However... one does not simply request an access token. No, no, no. That would be too easy. First we must request scopes! But what scopes should we request? Well, that's step 0.
Step 0: Choosing Scopes
So there's this massive list of scopes, and you have to specifically request the ones you want your app to be able to access. If you miss one and try to use the API, you'll get an error telling you what scope you're missing. Luckily, the Slack API allows you to re-authorize the same app multiple times with different scopes in each request, and any new scopes will be added to the list that you've already authorized for that app.
This means if you miss a scope on the first request, it's no big deal. Just try the API endpoint you want to use and if you get an error, update the scope list in the URL and re-authorize with the missing scope that was listed in the error.
Ok, let's build our first scope request so all this will make more sense.
We're going to 'build' a URL by adding the list of scope we want to authorize to this base URL:
https://slack.com/oauth/v2/authorize?scope=SCOPE1,SCOPE2,SCOPE3...&client_id=CLEINT_ID
- Copy the
client_idfrom the new app you created in Slack and add to the URL above - Review the list of scopes and add the ones you think you'll need to the URL, separated by commas
- Open the URL and approve the app
- Copy the authorization code from the new URL after the approve screen redirects you

This authorization code is only good for 10 minutes! So make sure you're ready for the next step or just open the link again to request a new code when you're ready for step 2.
Step 2: Request an Access Token
Now that we have the authorization code, we can use that to request an access token.
POST: https://slack.com/api/oauth.v2.access?code={AUTHORIZATION_CODE}&client_id={CLEINT_ID}&client_secret={CLIENT_SECRET}
There it is! The elusive, magical, beautiful access token, in all its glory. We can now make authenticated API requests to Slack.
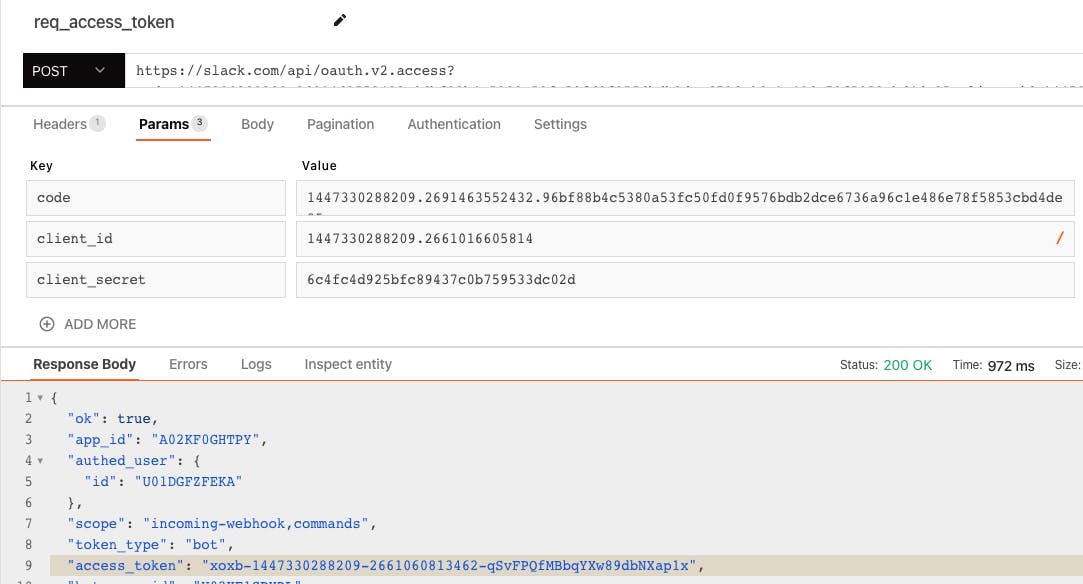
Be sure to protect the code just like a password! I've already deleted the test app I created for this post so that I could safely share the screenshots.
Posting a message to a channel
The Slack API has over 100 method for performing different actions or retrieving data. For this example, we're going to use the chat.postMessage method.
Add a new POST request in Appsmith, with the URL for the method you want to use. For sending a message to a channel, use:
https://slack.com/api/chat.postMessage?channel={CHANNEL_ID}
The easiest way to find the Channel_ID is to view the channel from the Slack webapp and get the ID from the URL. You can also use the API to get back a list of channels and lookup the ID, but you only need to look it up once and don't really need to build a separate API call just for that.
Simply login to the Slack website and click on the 'launch Slack' button for the workspace you want to use. When prompted to open Slack by the browser, click cancel and then 'open Slack in the browser'.
The Channel ID comes after the Client ID:
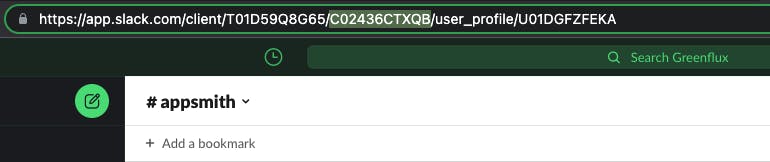
Use this value to set up a new POST request in Appsmith.
POST: https://slack.com/api/chat.postMessage?channel={CHANNEL_ID}
Then add the Authorization header, using the authorization code from the previous request.
Authorization: Bearer {authorization code}
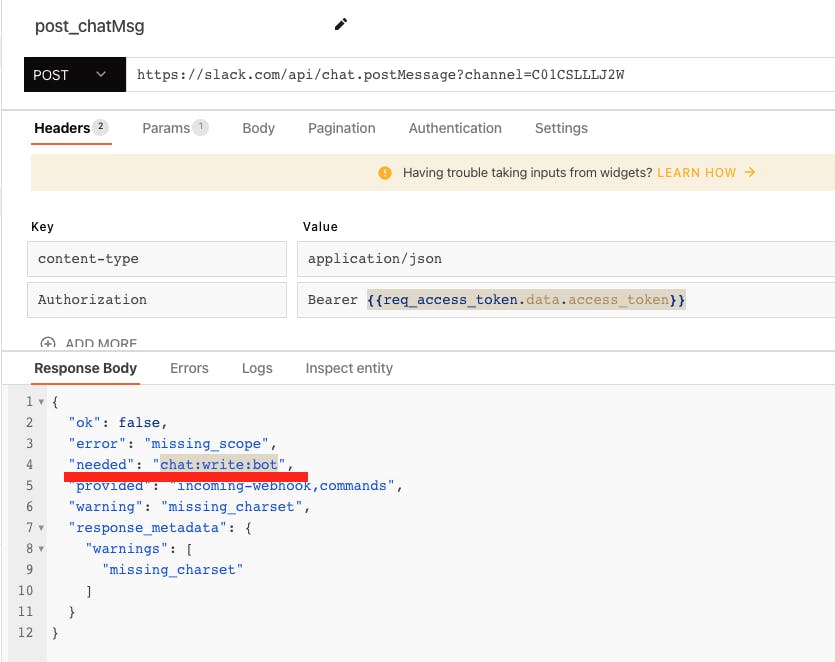
What's this? The response code is 200: success, but the response body says it's an error. This means our authentication is correct, but our app is missing a required scope for the endpoint/method we're trying to use.
As I mentioned above, Slack apps can be updated with additional permission by editing the scope-request URL and reauthorizing the app. New scopes are added, but no scopes will be removed if you leave out previously requested ones.
So update the URL with the scope(s) listed under needed in the response body.
You'll be redirected again and given a new authorization code, so add this to the previous API and request an access token again.
Ok, let's try sending the message again.
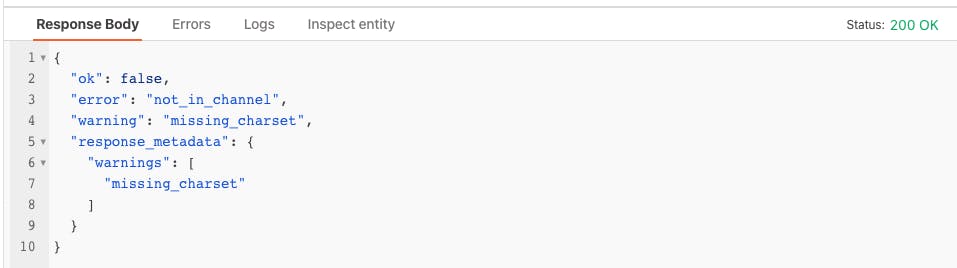
Hmm... ok, the new scope is added, but now the response body.error = "not_in_channel". This means our bot user is not a member of the channel we're trying to post a message in.
Open Slack and go to the channel, then type a forward slash to open the slash-command. Then invite your bot (the name of your app)
Run the chat.postMessage one more time and you should finally get a message to go through.
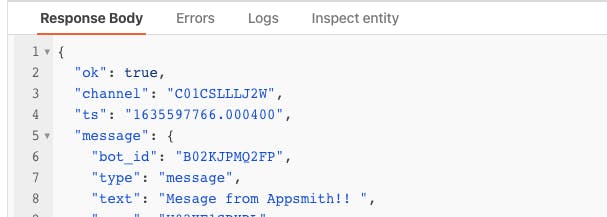
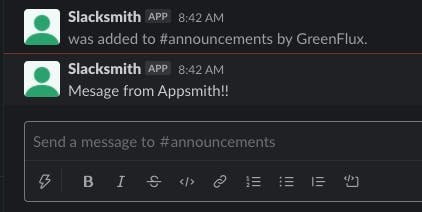
SUCCESS!

That's a lot of work just to send a message! But now we have everything needed to start using all of Slack's API methods and do a lot more, like add/remove users, create channels, and all kinds of other actions.
There's also a wide range of formatting/styling options and interactive components that can be sent, instead of plain text messages. Slack 'surfaces' can be used to send advanced messages with buttons, links, and other interactive components.